Generally speaking, the following tips are for those who know that they will be biking more than once a month or [gasp] a few times a year.
These tips are for newbies in training (for say, a triathlon), as well as those who are looking for a fun new way to get fit (cycling is about the only way I can shed pounds fast, easily, and healthfully), and cyclists who’ve been away from the sport for awhile (like me).
Whether you’ll be doing short- or long-distance rides, doesn’t matter. But if you’ll be riding on the road (rather than a bike path or offroad), then these tips will come in handy. They should save you some money, and could even save your life!
Following are my best tips for brand new (or returning) cyclists…
#1 If you’re buying a new (or used) bike, make sure it’s a lightweight one.
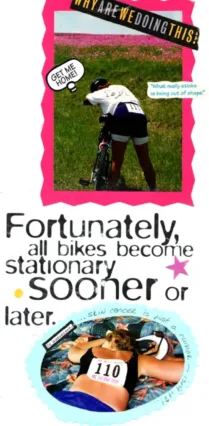
I say that, based on the fact that I did NOT do that.
When I purchased my first bike (for general exercise and something to do outdoors), I went with a mountain bike. The result: it was very heavy which translates into “takes much more energy and endurance to pedal long distances”. Yes, I was a true novice at the time, and I thought everyone was buying mountain bikes, so I did too. I simply didn’t know the difference. (Even though I had no intention of biking offroad.)
Turns out, I paid the price the time I rode my mountain bike on my very first 60-mile organized ride. The SAG (“support and gear“) vehicles were on my tail, as I (and a friend, also on a mountain bike) were at the far end of the pack the entire time. (Who am I kidding?… The “pack” was nowhere to be found, everyone else finished hours before we did!) Yeah, those SAG vehicles were watching us closely — making sure we didn’t pass out — but we declined their offers to quit, and finished out the ride on our heavy mountain bikes.
Oh, and along these same lines, make sure you buy a bike from a bike shop, not from a department store! Jim P. has some good reasons for this. I actually bought my first bike from Sears — because I wasn’t familiar with bike shops at the time. I thought only the “fast” cyclists shopped at bike shops. Wrong! I was also attracted to the fact that my Sears bike came with an “awesome tune-up plan” (Free tune-ups every 3 months, it was included in the price; but what the heck does Sears know about bikes? They had a regular maintenance guy “tune it up” in the back room — I know, cuz I watched one time.) It was a silly mistake.
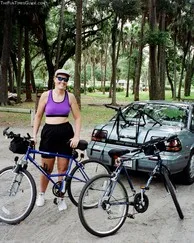
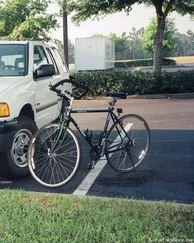
My next (and current) bike was purchased 2 years later at a bike shop, where I was properly fitted for a bike and I also learned a lot of helpful tips (about tires, tubes, changing flats, helmets, etc). My bike is a 21″ Trek 730 multitrack (hybrid) bike. It’s the vintage 1995 model. It’s not as lightweight as most road bikes, but with thinner tires, clipless pedals, a smaller seat, and the different handlebars I added, it’s close. Compared to my original Sears bike (which was a mountain bike), my Trek bike is a million miles away from a mountain bike! At the bike shop, they call mine a country bike.
#2 Buy a pair of cycling shoes and clipless pedals.
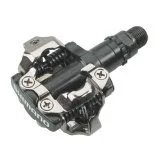
You will definitely be glad you did. They take the “thinking” out of pedaling — especially on the uphills. Plus, you don’t have to concentrate on keeping your foot squarely on the pedals the whole time. You’re free to just enjoy the ride. And no, clipless pedals are not just for the “fast” cyclists. (I have these clipless pedals.)
I truly believe that it only takes one outing to fully get used to clicking in and clicking out of clipless pedals. But, rest assured, you don’t really have to “think” about clicking in or out at all (it just seems that way at first). How’s that, you ask? The truth is… any time you turn your foot, then your foot will automatically come out of the pedals. If you find it doesn’t work that way for you, then loosen the contraption on the clipless pedal that your shoes clip into — it’s adjustable.
Once I figured this out, I found it very reassuring to know that you don’t have to worry about getting your foot stuck in the clipless pedals. Or, worse yet, having your foot stuck while the rest of your body — and your bike — go crashing down to the ground! Instead, your feet will naturally release — no worries.
When you get clipless pedals, you have to buy bike shoes — they’re made specifically to “click into” clipless pedals. I chose mountain bike shoes, whereas most of the serious road cyclists opt for road bike shoes instead. This, despite the fact that most of my friends who wear road bike shoes can’t wait to get them off after a ride, and they complain how awkward they are to walk in when you’re off the bike (at a rest stop, for example). You walk like a duck in road bike shoes. But with my mountain bike shoes, I never had to worry about any of that — you can wear mountain bike shoes while you drive, in a store, etc. and no one can even tell they’re bike shoes because they look like regular tennis shoes. (I have these Shimano bike shoes.)
#3 Wear bright colors when you’re cycling.
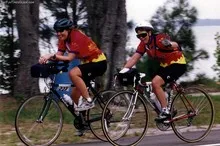
Especially during those times when you’ll be riding alone (like on the Natchez Trace Parkway), I would encourage you to wear red, bright yellow, neon green, or some other very noticeable color of cycling jersey (or just a regular shirt, whatever).
This is extremely important whenever you’re biking on narrow roads (like those without a shoulder or a bike lane), or curvy roads, or lightly traveled roads (where drivers don’t normally expect to see a lot of cyclists on the road). I know of 2 cycling friends (people I’d met at organized rides) who died while riding alone on roads without shoulders. And another almost died when bickering with a motorist that almost ran her off the road. So don’t do that either.
I’ve had jerseys from lots of different brands, including Pearl Izumi, Giordana, and Nashbar — all of my bike jerseys have held up well through the years, regardless of the brand. (Of course, I don’t put these in the dryer either.)
#4 Definitely get a side-view mirror.
It’s one of the cheapest bike “extras” you’ll be buying. Most of the faster cyclists I know (those who spend a lot of time on the road) choose the really tiny sunglass mirror or helmet mirror that rests right up near your eye. But I prefer a handlebar mirror instead. It’s probably more of a mountain biker’s mirror. (That, or a mom, dad & the kids mirror.) Anyway, it’s much bigger than the helmet mirror and has a much greater range. It’s easy to adjust it up or down, out or in. I love it.
I truly wouldn’t be able to enjoy a bike ride (of any length) without knowing what’s going on behind me at all times. Whichever type of bike mirror you prefer, just get one.
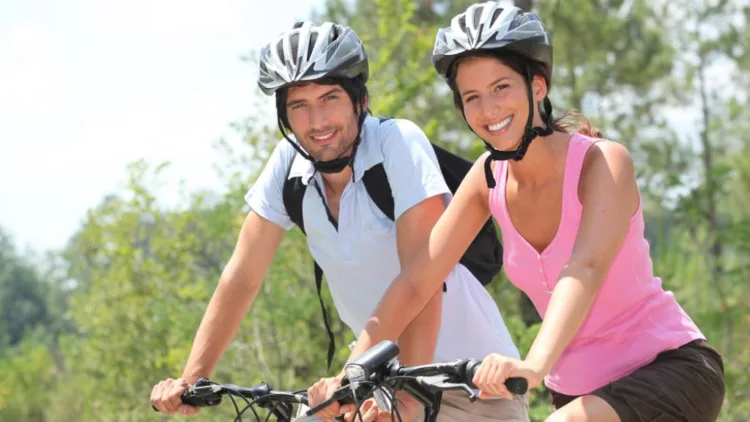
#5 Wear a helmet.
Yes, even when you’re just biking around the neighborhood.
ANSWER: They’re not wearing a helmet! Those are the cyclists you want to steer clear of Idiots.
#6 Invest in some cycling shorts.
At least 2 pair (I currently have 7), so you’ll always have a pair of cycling shorts ready (in the event that you don’t get your other pair laundered quick enough between bike rides.
TIP: Don’t put them in the dryer. I don’t know if anyone really does that or not, but in this modern world of fancy schmancy dryers and everybody wanting things done quickly… I can see people trying it. They’ll shrink and all of those find qualities that make cycling shorts what they are will start to break down very rapidly (like the grippies around the legs and elastic in the waistband). Cycling shorts should only be air-dried.
For what it’s worth, I have 5 pairs of Pearl Izumi women’s cycling shorts (yes, there’s a definite difference in the fit between mens & womens cycling shorts!) and 2 pair from other brands. The only ones that are still in tip-top shape — even after years of wash & wear (plus 5 years of being stored away) — are the Pearl Izumi ones. The other 2 pairs are showing serious signs of age and deterioration. The lycra material itself and the crotch padding are still in decent shape, but the elastic has basically disintegrated –in the waistband and the “grips” along the legs. On the other hand, the crotch padding, the lycra material, the waistband, and the leg grippies on the Pearl Izumi ones… still LIKE NEW 13 years later!
#7 Think about a different bike seat.

From day one, I’ve had a “cushy” bike seat, rather than the regular hard seat that most bikes come with. And when I got my lightweight (non-Sears) bike, I opted for a bike seat made for women that has the middle cut out. It doesn’t look as silly as it sounds. Nor does it feel strange. Ha, that’s the point… you barely even know it’s there! I can’t imagine spending the long hours I’ve spent on a bike without it. Trust me, that is an area that receives a lot of pressure — and even with a cushy bike seat, your lower region will definitely be feeling it after your first 2 or 3 bike rides. (If you haven’t been cycling in years, that is.) Mine is like this one.
#8 Get an aero bar.

I didn’t get your typical road-biker’s aerobar. Mine is a silly-looking contraption that a bike shop guy made for me — similar to this one. You see, I wanted the convenience of leaning down and riding on the handlebars, without having to reach way out there and extend my back the entire time I was biking. (A lot of my road-biking friends were saying it wasn’t all that comfortable of a position to be in after hours of riding.)
Basically, the bike shop guy put some other bike part (it might actually be an aero bar for mountain bikes, only it didn’t have any cushy padding on it. So he added that for me too) onto the ends of my handlebars. The part that I lean on extends closer to me, rather than farther away where I have to reach way out to lean on it. So I don’t get the true aerodynamic benefits that cyclists get from aerobars from leaning way down low, but mine is COMFORTABLE. And I’m much lower and more aerodynamic than I was without it.
My bike shop friend also added a couple of elbow-rests onto the bar for me. While it’s not pretty, it works well for me. In fact, I used to get heckled quite a bit for this “outside the box” way to make an aero bar. But my biking attitude (and my increased speed) won out, and people quickly saw how this contraption really worked for me!
The point: Do what works for you to make yourself more comfortable and more productive on the bike. It’s really not about looks. I’ve never taken that bar off my bike — and it’s been well over a dozen years now! I still get funny looks sometimes.
#9 Learn how to change a flat tire.
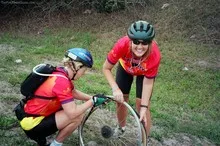
I have changed about a dozen flat tires in my days of biking. For most of them, I had the luxury of having cycling friends around me to walk me through it, or lend a hand with the air pump. The point: Flats happen. Just ask Jim… he got 5 flats in ONE day! The most I’ve ever had is 2 flats in one day.
Trust me when I say… changing the tube in a bike tire is EASY. All you need is some tire levers, and a spare tube. After watching someone else do it a couple times, then trying it yourself a couple times, you’ll have the process down. (And you do realize… you don’t have to have a flat to practice on your own tires, right?)
The best place to learn for the first time: your local bike shop. They’ll walk you through it step-by-step and show you all the quick tips that make changing a tire a cinch.
This would also be a good time to point out that thinner bike tires are better than thicker tires for road biking, because you’ll go farther faster and with less effort. Thick tires, on the other hand, grip the road more, provide better traction, and slow you down. Thicker tires are better for riding offroad on mountain bikes. My tires are 700×23.
Oh, and for the newbies… thinner tires does not mean “harder to balance” or anything like that. That’s partly why I went with a mountain bike for my first bike — because I liked having “more tire” underneath me, for stability purposes. That was a myth. Thinner tires are so much easier to get around on.
#10 Choose your preferred means of airing up your tires.
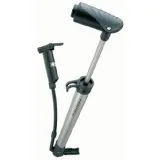
By now you know that I’m not in this sport to be (or “look like”) a great cyclist. And never is this more evident than in the way I air up my tires. (Okay, maybe the fake aero bar tops this, but it’s close.)
The fact of the matter is, I see no point in using tedious hand pumps when you’re out on the road and you get a flat tire. Pocket-sized air cartridges are much easier to carry around (I have a bike bag — oops, that’s not really cool either) and they’re much easier to use than an old-fashioned air pump. (I used to have one of those that clipped onto my bike, but it was the first accessory I ditched when I discovered air cartridges!)
While most of the “true” cyclists that I used to bike with would ever be caught dead using anything other than a manual air pump, I just don’t get it. I’m all about convenience and practicality. Not to mention the fact that when you get a flat, you’re already flustered and sweaty, and you just want to get on the bike quickly. Making the process more tedious than it has to be (by airing up by hand) just doesn’t make sense to me.
Along these same lines… to make the process of airing up before each ride even faster, I bought a little 12-volt air compressor. I keep it in the car. It plugs into the cigarette lighter. Both of my tires are fully inflated and ready to go in seconds — without the 5-minute workout that manually pumping a floor pump or a hand pump require.
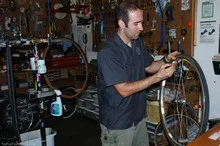
UPDATE: My new bike shop friend (Chris at Harpeth Bicycles in Franklin, TN) says the reason most cyclists still carry a hand pump is for backup. Which I guess makes sense. In case you run out of cartridges (like we did with Jim the day he got 5 flats), then a hand pump may be your only option. Actually, at that point, I think a cell phone is my option at that point — to call for a ride!
Next up… my favorite tip of all. Biking up hills!

