Okay, so you have your equipment and your fundraising is off to a good start, now it’s time to start training.
Yep, you need to train for walking.
The Susan G. Komen 3-Day site has a great section on training for an event like this, so be sure to read it thoroughly. The blog sites referred to in my earlier articles also share training tips.
I’m going to share some tips that I learned firsthand after participating in my first Susan G. Komen 3-Day Walk.
Before You Start Training…
Let me be clear that I am not offering professional advice on training or medical situations. Please be sure to consult with your doctor or medical provider before beginning training, and make sure they know you what you are planning to do. Talk to them about any special needs you have — or might have on the event — including all your medications.
You will need to pack your medicine with you during the event, and you can talk to the coaches if anything needs refrigeration. They can also make arrangements if you have a CPAP machine that needs electricity at night or have any other special needs.
In addition to an extensive training handbook and online resource of training topics, the 3-Day site has 24-week and 16-week training schedules. Both schedules were created for any level of fitness. Each week has Monday as a day of rest, Wednesday and Friday are for cross-training, and on Tuesday, Thursday, Saturday, and Sunday – you walk.
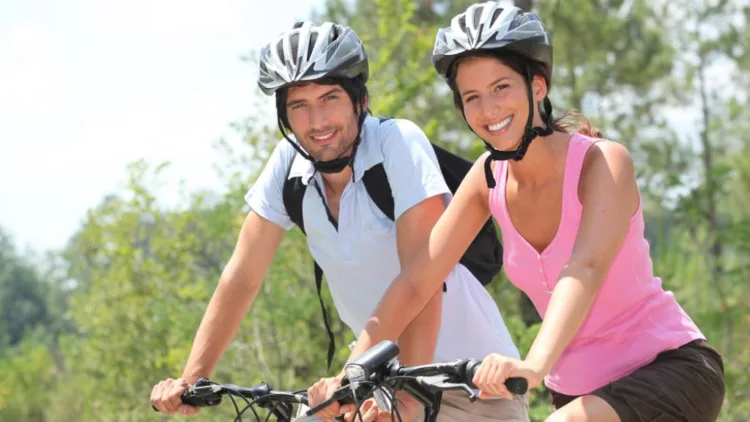
As you can see, the miles slowly increase each week until it tapers off close to your event. The cross-training can be anything you want: biking, swimming, aerobics, kick-boxing, dancing, etc. It could even be more walking, but it is strongly recommended that you give those muscles a break (not to mention your feet).
While you are training, as much as possible, wear and use the actual equipment that you will be wearing and using at the event. It is less important at the beginning, when the mileage is lower than it is towards the end. So if you are still searching for the perfect pair of walking shoes, it’s okay to wear your old ones while you begin training. Just be sure to “break in” your 3-day shoes at least 1 month before your event, and do as much training in them as possible. As recommended, you should have 2 pairs of shoes for the event that you alternate during training.
Training: Day One
The first training walk on the schedule is 3 miles. Can’t do 3 miles yet? No problem. Just walk as far as you are able. Push yourself — but not beyond what you can do relatively comfortably.
If you are not used to walking farther than the mailbox, it may take some time for you to be familiar with the difference between normal muscle soreness and something painful, so start slowly. Each day, try to walk farther until you catch up with the schedule.
I chose to use the 24-week schedule and actually started walking 2 weeks earlier and just repeated the first training week. It was nice to walk 3 miles several times before I had to jump up to 4 miles.
I started training in February, so this was all walking on a treadmill, in front of the TV. As soon as the weather allowed, I started walking outside. And then it got hot. Really hot. So some of my summer walking was also done on a treadmill. You will want to do much of your training in similar conditions as your event — including the terrain — but indoor walking is fine when necessary.
My 3-day walk was in Chicago, mostly on paved sidewalks and streets through mostly flat neighborhoods, and thankfully my training neighborhoods were similar. I’m not sure what I would have done if my event was in San Diego or another of the more hilly and diverse locations. Be sure to keep your final destination in mind as you plan your training. If you are not sure what it will be like for your walk, you can ask previous walkers on the Komen participant site after you’ve registered.
Logging Your Miles
During my walks, I tracked my miles with both a pedometer (I used this one) and an app on my phone called Map My Run. It’s a FREE app and very cool.
Map My Run requires that you activate the GPS feature on your phone first, and then it will pinpoint where you are and where you walk. The detail is amazing. You can tell when you cross a street or stop to tie your shoe. It will also tell you the miles you walked, start and stop time, and speed. You can record all of this detail from each walk, or delete it when you are done. You can save the map portion of your route if you like — in case you want to do it again later.
I used the mileage from the GPS on my phone and from driving my car to calibrate my pedometer to be correct. Most pedometers allow you to measure and set your gait so that the size of your steps will accurately measure the distance you walk. This took several outings for me to believe my pedometer was keeping accurate distance.
Between Map My Run and my pedometer, I was able to plot out several 3- and 4-mile walks to do from memory — so I didn’t always have to measure my miles. You won’t need a pedometer or other tool at the event itself, because everything is mapped out for you. (More on that in the next post.)
I kept track of my training in a couple of different ways:
- One way was to use the printed training schedule from the 3-Day event. I highlighted the days I walked, modifying the miles if necessary. This was a nice way to see the whole thing at one glance.
- Another way was to use a large calendar. I wrote the actual miles I walked each day. I liked seeing each week/month at a glance.
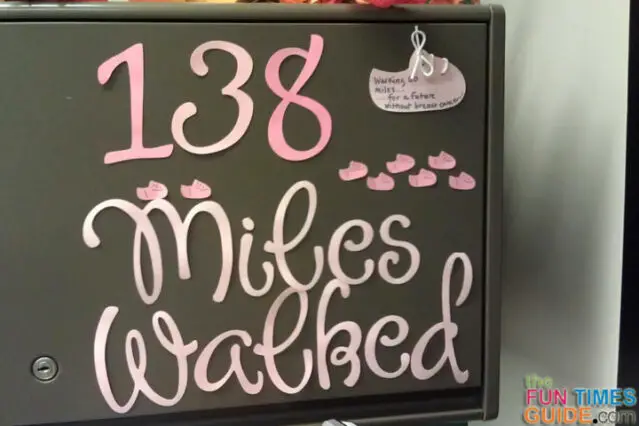
- And finally, I tracked each mile on a tally board at work. I used my Cricut Expression machine to make the words “miles walked”. I used pink paper with “scrolly” letters that mimicked the pink ribbon for breast cancer. Along with numbers, I put a small piece of magnet tape on the back and put them on a magnetic file cabinet for all to see. It was so satisfying to watch the number grow as my miles did. Colleagues and strangers would ask about my progress for this adventure, giving me an opportunity to share the word on breast cancer and the 3-Day Walk in particular.

Optional Accessories
On the shorter walks (up to 10 miles), in addition to my pedometer and phone, I would carry a bottle of water and my mp3 player and headphones. I also wore sunglasses and had a small towel tucked into my shorts to wipe away sweat.
On medium-length walks, I wore the backpack I intended to wear during my event with the following additional gear:
- sunscreen
- bandaids
- Body Glide
- hard candy
- snacks
If rain was likely, I added a disposable rain poncho (from the Dollar Store, tightly folded and wrapped).
On longer walks, I also added extra socks and underwear. (See this post for more about that.) On any walk 12 miles or more, I tried to duplicate as closely as possible the gear and conditions of an actual day at the event. There were 2 differences between training and the event for which I was unable to compensate:
- On 3-day walks you are not allowed to wear any kind of headphones (for safety purposes);
- I had to carry all the drinks, meals, and snacks I needed for the day, while on the event all of that is provided.
Stretching Tips
During and after all of your walking, you should be doing plenty of stretching.
See the stretches recommended by the trainers for the 3-Day Walk.
Personally, I would usually walk about 5 minutes to warm up and then stop for some quick stretching.
How often you stop to stretch — and which muscles you stretch — will be something you decide based on your personal fitness level, any injuries or problem areas you have, and your own comfort level.
Always stretch immediately after the cool down portion of your walk. This will help you feel better the next day if soreness sets in, plus it feels good!
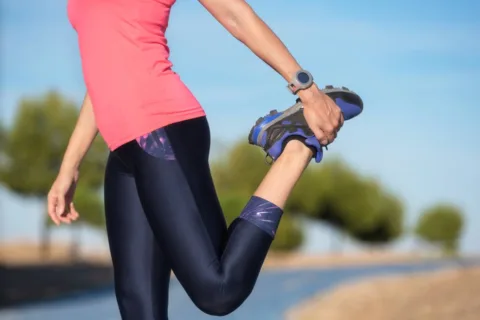
Here are 2 stretches that I found to be great (do them as much as possible)
- Calf stretch – On a step or curb, place your toes up and your heel down and stretch gently until you feel it in your calf. Vary the stretch by bending or straightening your knee. Another way to do this stretch: Squat down with your feet flat (like you are getting ready to sit on your bum), and gently roll forward on your toes as if you are getting ready to stand up. Stop when you feel it in your calves. This was my favorite stretch because it also hit the next area: your back!
- Back stretch – Stand with straight legs, bend down, and grab your lower calves. Pull up until you feel your back stretch. You can stretch straight up and feel it on both sides of your back, or you can alternate right and left to isolate each side. Do this frequently while you are walking. Otherwise, you will feel it in your back when you are done!
Eating And Drinking
Before and after your training walks, you need to pay close attention to the amount of fluids you are drinking.
Here are some training tips regarding fluids.
In addition to water, you should drink Gatorade or another sports drink to replace sodium that is lost from sweating while you are working out.
If you drink only water, you may begin to see the symptoms of hyponatremia, or low sodium in the blood. The symptoms mimic those of dehydration and can cause athletes to drink more water – which can actually make things worse, because what you need is sodium.
The 3-Day Walk provides sports drinks and salty snacks to help counteract hyponatremia. There is a mantra on the 3-Day Walk that sounds strange but makes sense and becomes very important: “Drink and pee, avoid the IV.”
Especially during hot weather, it is very easy to become dehydrated during each daily 20-mile walk. There is usually a pit-stop or full break station every 3 to 4 miles, and they say you should need to use the restroom at each one. If you don’t, you’re not drinking enough. I saw at least one person each day hooked up to an IV in a medical tent, and several walkers had to be taken to the hospital for overnight care. Some of them could return to walk the next day, and some of them could not. Each person treated in the medical tent has to be allowed to return to the walk, or they can be “red flagged” which means they will only be allowed at the meal areas and can only be transported by the sweep vehicles. Don’t be a red flag!
NOTE: Gatorade was an official sponsor of the Susan G. Komen 3-Day for the Cure in 2011 when I did my event. In 2012, Nuun was the official hydration partner for the event. Many walkers reported upset stomachs after drinking the Nuun and recommend taking along powdered Gatorade to mix with the water that is always provided. I would recommend training with Nuun if possible, and if you can tolerate it you will be fine. If it is unsettling to you, look for a powdered sports drink that you do like and plan to take it with you.
Avoiding Blisters
Nothing worries an event walker more than the dreaded blister.
I saw some terrible blisters during the Susan G. Komen 3-Day Walk, and I also met people who never got a single blister.
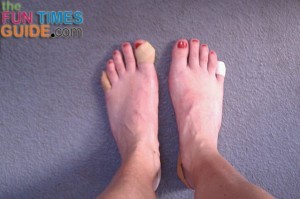
Before I started training, I read many stories from walkers about how to prevent and treat blisters. Many people swore by a product called Body Glide and I decided to try it. It comes in a stick like a dry deodorant and is designed to help prevent chafing. You rub it all over your feet before putting on your socks, and reapply it regularly. I did get some blisters during training and during the walk, and I don’t know if it would have been better or worse if I hadn’t used it. You will have to judge for yourself and pay attention to how your feet feel.
I got my first training blister on a 10-mile walk. A spot on the side of my heel was starting to get sore. They call this a “hot spot” and recommend you check it out right away. (As in stop where you are and tend to it. Don’t wait until the next pit stop.) There will be medical personnel available to you at all the rest stops and through a sweep van, plus many other walkers will be available to assist.
When I felt the sore spot, I did stop and check it out. It was starting to look red and I put a band aid on it. After several more minutes it still hurt and was getting worse. I decided to cut my walk short rather than keep walking and make it worse. By the time I got home, it was a full blown blister (a small one, but still). It was still there 2 days later for my next training walk, and this was when I learned about the magic of 2nd Skin blister pads by Spenco. These are small squares (I used 1-inch squares) of moistened gel pads used to cushion and protect the blister or hot spot. They are wonderful!
You place them over the blister and secure them in place with a patch of moleskin or a bandaid. I had to try a couple of different brands of moleskin to find one I liked. Some were too thick and not sticky enough. A word of advice: If you like the 2nd Skin, be sure to carry some with you on the walk! The medical teams used them by the bucket, but on the last day they were running out and I was glad I had my own. Especially since this is the blister I was dealing with for 2 days!
It developed on Day 2, and I did my best to keep it covered with 2nd Skin. Honestly, it didn’t cause me as much pain while walking as you would think by looking at it. I was more worried about it popping during my sleep. On the morning of Day 3, it was huge and I went to the triage tent in camp for assistance in wrapping it. (The triage tent was outside the medical tent, staffed with volunteer doctors and nurses who could help with foot care. If the blister or wound required more care, they would send you into the medical tent.) A nurse told me my blister would qualify for lancing (due to its size) and suggested I go into the medical test.
Lancing is when a needle is used to pierce and drain the blister, and it is not recommended that you lance a blister yourself. (This is strongly expressed in the 3-Day event medical materials.) The line for the medical test was quite long, and I decided not to wait in line. Besides, I knew what it was going to feel like to walk with the blister… who knew how much it might hurt to walk with a lanced blister? So I asked the nurse to help me wrap it with 2nd Skin and moleskin and shove it into my shoe. At lunch, I took my shoes off to dry them out from rain and went to the medical tent to rewrap the blister, and they were out of the 2nd Skin pads. I happened to have a couple in my backpack and was very happy for them.
Where To Do Your Training Walks
So where should you do your walking?

This answer is easy: Anywhere you want to!
When I was doing shorter walks, I liked having my apartment as a home base — so I didn’t have to carry much gear and I could stop in anytime I needed to (for a restroom break, water refill, new bandaids, snacks, stretching, cooling off in the air conditioning, etc). There are several neighborhoods around me, so that was easy to do and I did most of my walking through them. One huge advantage of walking through neighborhoods on hot days: sprinklers! I adjusted my route many times to hit the houses that had sprinklers on.
My thoughts about other walking areas:
Country roads – I did a 15-mile training walk on country roads — using my sister’s house as a break place — thinking it would be easy. In reality, it was very challenging. In contrast to my neighborhood, there is very little to look at in the country. Long stretches of pavement and corn fields don’t do much to help pass the time. In addition, the temperature was in the upper 90’s and the pavement actually started to melt under my feet and stick to my shoes. (Yes, it was so hot the streets were melting!) There was very little traffic to contend with, so that was good. But there were several hills and curves that were tricky because I couldn’t be seen by oncoming traffic.
Downtown – This was another route I thought would be better than it turned out to be. The blocks in my downtown area are very short — which means lots of streets to navigate crossing, either by stop sign or stop light. It really became a challenge to just keep walking, because there was a lot of stopping at corners. I don’t actually recommend downtown walking for this reason.
University campus – This was the best place to walk. I especially recommend days that students are on vacation. For me, it was over the 4th of July holiday, and I had to walk 18 miles. I think I covered every space on this campus and it was great. There was a McDonalds very close where I got water and used the restroom. It would have been a challenge with all the students on campus, but during the break it was perfect.
Inside an elementary school – During a rainy 15-mile walk, I had access to an elementary school and walked the halls. It was a small school and a challenge to vary my walking routes, but it was doable. I would do it again if necessary.
Inside on a treadmill – I chose this on several days to avoid the rain or the extreme heat outside. I watched a lot of movies and reality television! You shouldn’t do all of your walking on a treadmill, but it is totally fine every now and then. It also gives you the opportunity to vary the hill element of your walk.
Inside a shopping mall – This is one place that many people walk regularly for training purposes, but I did not. The mall near me is small and has one store with an obnoxious (to me) cologne smell that takes over. I can barely walk past this store once when I’m there to shop, never mind repeatedly for walking long miles. I read about some people who could do their entire set of miles by walking once around the Mall of America!
Random Tips From My Training Experiences
- Be sure to carry your driver’s license or other form of ID with you when you walk. If something should happen to you, it could be a lifesaver.
- If you are walking on a road with no sidewalk, the rule of the road is that you should walk in the same direction as automobile traffic. Many people think it is safer to walk against traffic, or into oncoming cars. You should really only do this if required — due to blind hills or curves — where you are hidden from oncoming traffic.
- Audio books were a lifesaver for me. I downloaded an app for my phone and listened to several books over the course of my training along with music. Just remember, you can’t listen to them on the walk since you can’t wear headphones.
- On shorter walks I would usually carry and drink only water, and then I would drink Gatorade after the walk. I was aware of the symptoms of dehydration and hyponatremia and was watchful for them, but this method seemed to work for me. On longer walks, I would alternate the 2 drinks during the walk.
- Stretch… and then stretch again. It was easy to “forget” to stretch when I was walking by myself, but it really is important. Stop under a shade tree and do some stretches. You don’t have to do the whole rotation every time you rest; you can alternate them. My 2 favorite stretches are mentioned above.
- Having any problem with your shoes? Maybe you can adjust how you tie the laces. My feet are not exactly the same size, and the heel on the smaller foot always slips in my shoes. This is how I tied my laces to help solve that.
- Drink more water/sports drink than you think you need… because you need it.
- On really hot days, I filled my water bottle with lots of ice — partly to keep my drink cold, and partly so that I could hold ice cubes in my mouth. I would still drink plenty of water, but doing this helped keep me cooler.
- I would also suck on hard candies. I’m not sure how this helped exactly, but I sorely missed them when I ran out. People along the route on the event will hand out all kinds of treats — including hard candies — so in one sense this was true event preparation!
- Take advantage of technology. The Komen 3-Day Walk offered a Virtual Personal Trainer via email, which delivered weekly training tips and training schedule reminders.
- Look on the event website for any sponsored training walks in your geographic area. These will be hosted by experienced volunteer walkers and would be a great way to meet other walkers. There were none near me, and I think that was a real missed opportunity.
- Be sure to do some sort of cross training on the scheduled days. For the most part, I chose to use those days as “rest” instead of working out, and I think my endurance suffered on the walk.
- Don’t stress over the training schedule if you have to miss a day or adjust the mileage for some reason. Miss a Tuesday walk because you’re sick? Walk it on Wednesday. Have to reduce a 7-mile walk to 5 miles? Add 2 miles the next time. Or not. As long as you are progressing and increasing your mileage each week, you should be fine. I do recommend walking all of the weekend back-to-back walks that you can — especially the long ones. I added a third day to one of the weekend walks, just to see what it would be like walking 3 days in a row. By no means did it replicate the actual 3-day 60-mile walk, but it was a “step” in the right direction. (Ha ha!)
- Use your training walks as an opportunity to tell people about the event. Part of your registration materials should include a sports bib to pin onto your shirt or backpack. Mine says “I Walk For…” on one side and “3 Days, 60 Miles, Ask Me Why I’m Walking!” on the other side. It also has a thermometer for you to indicate your fundraising goal and progress. You can also wear your 3-Day shirt or hat while training. I recognized another walker in training by her 3-Day headband.
- Train in the rain. Unless you are very lucky, it will rain at least once on your event. It will be good for you to know how your shoes feel when they are wet. How quickly do they dry out? I did not train in the rain, and it rained once a day on my event. On Day 3, when I was dealing with the huge blister, it rained solidly and hard for about 3 hours. I learned that my shoes dry out very quickly if I can take them off and let them sit in the sun. It takes a lot of discipline to make yourself go outside in the rain when you don’t have to… and I couldn’t do it!
- Dealing with injury: About 4 weeks before my event, I started experiencing severe pain on the instep of my right foot. It felt similar to some tendonitis I had experienced years earlier in my hand, which was successfully treated with a shot of Cortisone. I was sure my foot could be quickly treated in the same way, so I went to a foot specialist. He quickly determined it was not tendonitis and suspected it was a stress fracture. A bone scan supported that diagnosis, and the doctor said I would not be able to do any additional walking. I would have to heal the stress fracture by wearing a supportive walking boot. This was one week before my event, and I was determined to participate if at all possible. The doctor taught me how to wrap my foot with athletic tape and suggested I cut back on the rest of my training. I took the boot to the event with me and decided I would take the sweep vehicle if my foot hurt too badly. In reality, the blisters were more painful than the fracture during the walk! I wore the boot after my walk, and my foot has fully healed.
Okay, you are now filled with knowledge about walking and training for a walking event.
Good luck with your training. On your mark… get set… WALK!
