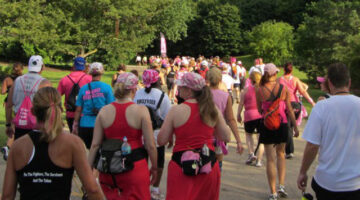
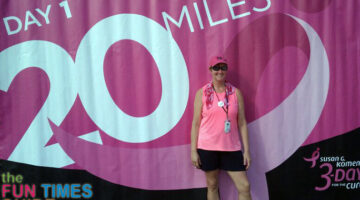
I did my walk (the Susan G. Komen 3 Day Walk) in Chicago at the beginning of August — after training during the hottest summer on Earth — so my knowledge of this aspect only involves warm weather walking.
Obviously, you will need to determine what the temperatures are likely to be during your walk so you can plan accordingly.
It should also be obvious that I am female, therefore my suggestions and tips often cater only to women – sorry guys.
Lesson Learned: Everything Has A Break-In Period!
One of the biggest things to keep in mind: never wear anything on a 3-day walk that you have not worn for training.
This actually applies to everything you will have with you during the entire 3-day experience – on your person, in your pack, or in camp.
You don’t want to be 15 miles into Day 1 and discover that your new underwear cause chafing, or that your sunglasses pinch your head.
Try everything out on some of your longer training walks. What feels fine for 3 to 5 miles might be a real problem after 12 to 15 miles.
The training manual for the Susan G. Komen 3-day walk includes an excellent packing list of things you will need on your walk. In addition to those things, I will add some other helpful things that I learned firsthand.
Find The Right Shoes
The most important piece of equipment will be your shoes. You will need 2 pairs (well broken in) to take of the 3-day walk. DO NOT wear new shoes to the walk.
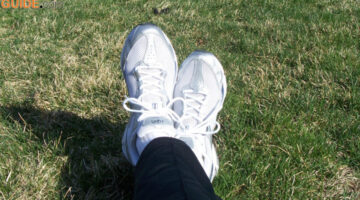
Read everything in the training manual about how to shop for shoes. In all the blogs and articles I read about endurance walks, every person had a different favorite shoe, and no one shoe was mentioned twice. I tried SIX different shoes before I ended up with my favorite walking shoe: Ryka Radiant.
The first place I shopped was a specialty store for triathlons. They offer shoe consultation and fitting along with a 30-day return policy, allowing for outdoor use of the shoes. Their receipts explain that they want you to be happy with your shoes, and that you can buy, try and return up to 3 pairs of shoes (with a $10 restocking fee if you don’t end up buying shoes from them). This was the best policy I found, after calling around to several stores in my area.
When I explained what I was shopping for, the staff member helping me had me walk in my bare feet to assess my gait, looking for pronation (feet rolling to one side or another). I had no noticeable pronation, so I did not need shoes with extra lateral support.
Now I wanted the most comfortable, cushiony shoes they had. My regular shoe size is 9, so my consultant said I needed a 10½, to allow for feet swelling and maximum shifting as I walked. That seemed kind of outrageous to me, but hey, she was the expert. So my first pair of shoes was by Brooks, size 10½. I walked for about 5 minutes on a treadmill in the store and decided to try them.
Honestly, while I was in the store, I felt the shoes rubbing on my feet – the same place on both feet – and I had a feeling that they weren’t going to work. But they cost $95, so they were going to be wonderful, right? Wrong! I wore them out of the store, across town to the mall, around 1 store in the mall, and I knew: these were not my shoes.
Okay, back to the store, explain the problem, get their 2nd best cushiony shoes (by Saucony) for $110. Also not my shoes. I was able to return them for a full refund (no restocking fee, yay!) and decided I would take my new shoe knowledge into other stores.
The next shoes I tried came from Kohl’s, Shoe Carnival, and JC Penney. I tried them out walking inside only, on my treadmill, since these stores will only accept shoes not worn outside. Some were more comfortable than others, but none of them were good enough. Lady Foot Locker had the Ryka Radiant shoe and – success! Several walks in this shoe convinced me it was the one I wanted. Oh, and they’re size 10 (not 10½), which is perfect.
Bottom Line Shoe Recommendations
- Try as many shoes as you can before you commit — being careful about the return policies. Don’t accept shoes that rub and cause any discomfort – they will not get better as you wear the shoes, and the rubbing will cause blisters. Try a different pair.
- Be willing to pay for a quality pair of shoes, but remember that the most expensive will not necessarily be the best ones for you.
- Don’t feel compelled to buy shoes that support the breast cancer cause – even the pretty ones with the pink Komen ribbon by New Balance, one of the biggest supporters of Susan G. Komen. If these are the best shoes for you based on fit and your trial walks, then by all means buy the shoes that will give a percentage towards the cause. If they are not, try a different pair.
How Many Shoes To Buy?
The next question is: how many pairs of shoes will you need?
They have to last through all of your training and the 3-day weekend. The specialty-store lady convinced me that I would need 4 pairs of walking shoes — because I would wear out 2 pairs with all my training, and I would need to break in 2 additional pairs about a month before the walk.
I ended up buying the 4 pairs, but returned 1 without wearing them.
My original pair cost $75, and I found 2 other pairs on eBay for $35 and $50. Shop around for the best price you can possibly find.
My conclusion after walking 500 training miles and 60 miles in the 3-day walk is that I could have gotten by with TWO brand new pairs, alternating them as I trained. Obviously this may be different based on your walking style and outside conditions, so watch them carefully for wear as you’re training. If your shoes are breaking down and might not last through your walk, be sure to break in a new pair for at least one month before the event.
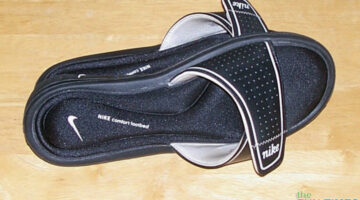
You will also want a pair of shoes for camp and for the shower. Most people wore flip flops. I wore a great pair of Nike gel slide sandals.
I thought the comfortable, cushioned sole would feel good after a long day of walking and I was right — they were perfect! The only problem with them: I also wore them in the shower, and the cushioned sole was like a sponge for the water. They squished for quite some time after the shower, and this was not good for my sore, blistered feet. I would recommend having a different pair of shoes for the shower if you also choose shoes with a gel sole for walking around camp.
Second Most Important: Socks
Okay, now that you have your shoes, it’s time to think about socks. Again, anything goes, just find something that works for you.
Options include:
- Length – crew, quarter crew, no-show, low-cut, ankle, or knee-high
- Thickness – thick, thin, ultra-thin, lightweight, mid-weight, or heavyweight
- Miscellaneous features – double layer, arch support, toe support, seamless, wearing 2 pairs at a time, and actual toe socks
The material should be some kind of “wicking” fabric. What is wicking, you ask?
You will become familiar with this word as you read all the 3-day stuff I’m recommending. Everything you wear should be wicking. Wicking is the magic fabric that will allow sweat, rain, and Gatorade to dry quickly or maybe even roll right off your clothes in little droplets. It will also keep you cooler.
Some labels will say wicking, while others will describe it as “coolmax”, “drymax” or some other clever word. Read carefully, and feel the fabric. It will not feel like a nice soft cotton (which is like the opposite of wicking), but more slick like polyester. I found that some clothes advertised as wicking actually have more cotton than polyester and do not do a good job of wicking.
I tried several types of socks before finding my favorite sock to be lightweight, thin, low-cut, and seamless at the toe Under Armour socks (89% nylon/7% polyester/4% spandex) from Dick’s Sporting Goods.
I thought I would like the no-show or ankle cut, but I did not like how they slipped at the heel. I thought Injinji CoolMax toesocks would be perfect for blister prevention, but they also slipped at the heel and I couldn’t get used to how thick the toes felt. You will be able to find someone who will swear by every single version of sock that exists. Only through trial and error will you learn which socks work best for you.
For what it’s worth… This leads me to a comment I received about the financial investment required for “trial and error” of all this equipment. During my training walks, I tried out a variety of clothes – things I already owned and new things I was trying out. Other than shoes, I had to keep all the things I tried out, specifically tank tops and socks. Fortunately, these are all items that I can wear for other things. They just weren’t right for the 3-day walk. Try to find things at Goodwill or other thrift stores, or borrow from friends before you commit to a purchase.
Finding Shorts For A Multi-Day Walk
On my 3-day walk, I saw people wearing shorts (all kinds – loose, fitted, Bermuda, jean), Capri pants (loose and fitted), loose track pants, fitted running pants/leggings, sweat pants, jeans, skirts and tutus. Yes, you read that correctly – tutus! The tutus were worn by both men and women, usually over shorts. (But honestly, I wasn’t about to check.)
I already owned several pairs of work-out shorts, but none of them were specifically made with wicking material. Before purchasing anything, I spent quite a bit of time looking around – from thrift/discount stores to high-end performance stores — both in person and online. Nothing compelled me to believe that I needed pricey shorts, so I found 2 comfortable pairs to try out. (Tek Gear, 86% polyester/14% spandex, from Kohl’s).
I wore them for short and longer walks, and they both were still comfortable. The waistbands were usually sweaty after a hot walk, but not to the point of causing irritation (meaning physical irritation – I was usually a little annoyed by this). I looked at the waistbands of different shorts and couldn’t really see anything that indicated they would be sweat free.
One pair of shorts had pockets in them and one didn’t. I decided I would really want to have pockets on each 20-mile daily walk. I would be wearing a back pack, but there was always something I wanted to have within easy access (chapstick, hard candy, money, sometimes my sunglasses), so I set out to purchase 2 more pairs of that style short so I would have 1 for each day.
But alas, the store only had 1 pair left in my size! I tried other locations of the store and their online site with no luck. I tried the next size up – too big. I looked for a different brand/style of short with pockets, but by this time, shorts were no longer being replenished in store inventories. (You know, early June, time to display the winter clothing, sigh.) So you can learn from my mistake. Do not hesitate to get multiple quantities of something as soon as you determine it will work for you.
I did find one pair that I thought might be okay — with pockets, and also a built-in panty. Turns out I do not care for shorts with built-in panties.
**TMI warning**
I tried wearing them with and without underwear, but I just do not like them. Some ladies I met on the walk swore by them, usually without underwear. More power to them, and to you, if they work for you. That is really the moral of the story: you must try things out and make sure they will work for you. There will be enough things bothering you as the miles build up, you don’t also need to be irritated by the built-in panty of your shorts! And while we’re still under the TMI warning, let’s chat about underwear. This was probably my biggest frustration (sweat-filled clothing wise) on my entire walk. During all my long training walks, my underwear would be completely drenched well before the walk was done – sometimes only halfway into it. None of the stores around me sold wicking underwear. I read about several online places to find some, but (1) they were pretty expensive and (2) they were non-returnable. My plan was to carry a spare pair in my back pack and change underwear at lunchtime. During training walks, I would put the sweaty pair in a zip lock bag until I got home. On the walk, I intended to just throw them away. (My underwear is not the expensive kind so I didn’t care about tossing them.) While not especially fun to do, it was refreshing for the 2nd part of my walk. However, on the actual 3-day walk, I realized the first time I used the restroom that this plan would be an epic FAIL. Did I mention that the restrooms on the walk are all port-a-potties? Yeah, they are. And there’s no way to maneuver and step out of your shorts and undies and put on fresh undies in a port-a-pottie. Not gonna happen — especially since not only were the undies sweaty and nearly impossible to pull up or down on equally sweaty legs, you can’t forget you’re inside a tiny, hot & steamy potty. Have I convinced you yet that you need to splurge on the wicking underwear? Do it!!! I definitely will for my next endurance walk. Brands I have heard are good are Ex Officio underwear and Under Armour underwear. The best I could do was use panty liners. I liked the thin and extra long ones. It’s still tricky pulling that off in a port-a-pottie, but it is possible, and they take up very little room in a backpack or fanny pack.
My apologies to any guys still reading along in this section, but I will wrap up the underwear portion talking about ladies’ bras. I chose to wear a sports bra, and I was able to find local, inexpensive options made of wicking material (Champion, 86% cotton/12% spandex; Champion, 84% cotton/16% spandex; Tek Gear 95% cotton/5% spandex). I found them to be more bulky and heavy and cover more surface space than my other all-cotton sports bras, but they did stay drier after the long walks. I will caution that “drier” is a relative term, as any bra I tried out was wet and sweaty after long walks in the summer heat and humidity, but the wicking material did keep the wetness off my skin better than the cotton bras. Some walkers prefer bras with front fasteners for this reason (easier to manipulate than back-fasteners), but I did not try any of those. I know some walkers wore regular, non-sport bras, and I’m not sure how they compared.
Deciding Which Tops To Wear
I have always preferred to wear a sleeveless t-shirt or tank top when working out, and the same is true for walking. For some reason the sleeves just get in my way. I have a friend who always wears something with sleeves so she can use it to swipe off sweat from her face or forehead. (I use a towel for that, more later.)
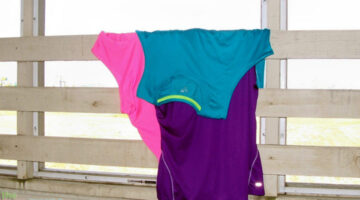
Many of the shirts I already had were not made of wicking material, so I was on the hunt for some good shirts. I must have tried 5 or 6 before I found the shirt (Champion tank top, 100% polyester, from Target).
I learned from the shorts experience and purchased 3 as soon as I realized that I liked it. It was a great shirt and really did keep me fairly dry. In addition to sweat, the shirt got wet in other ways (rain, a cold-water bandanna wrapped around my neck, spillage as I gulped from my water bottle, squirt-bottle wielding supporters, and huge fans blowing cold water in front of a couple of fire stations) and was almost instantly dry again.
If only I could have found all my clothing made exactly like this; I would have been super dry the entire time!
One thing about shirts... There were many groups on my walk wearing matching t-shirts that they had specially made for the event (telling the story of a loved one, displaying their team name, listing the names of cancer survivors and/or those who have passed away, advertising supporting companies… you name it). Most of the shirts were screen-printed t-shirts, either 100% cotton or a 50/50 blend. I didn’t hear a single person complain about it, but I know these shirts were wet and sweaty and not wicking material. Many people were clearly dressed to celebrate the event and not necessarily for comfortable walking. It was impressive and inspiring to see both small and large groups proudly supporting whoever or whatever was on the shirts. If I had been on a team, it would have been a tough decision to wear a shirt like that to be a part of the team vs. wearing the great wicking shirts. I might have been able to get the “logo” printed onto the wicking shirts, but I have not seen others have much luck with that.
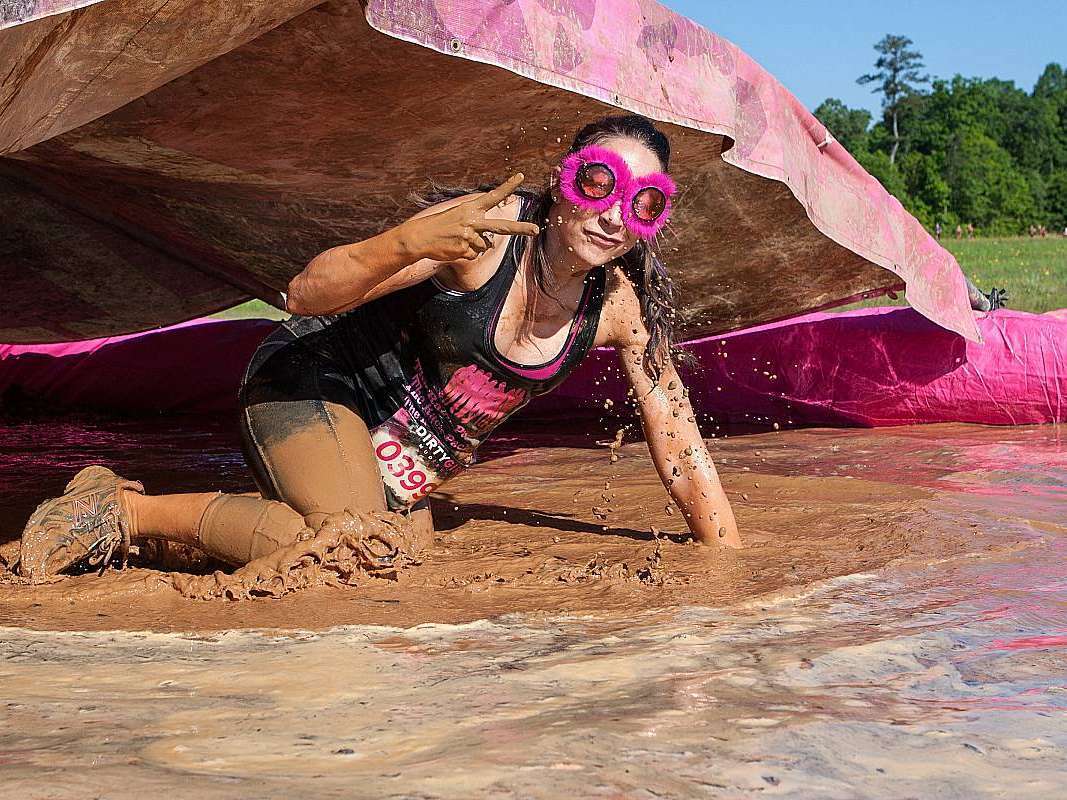
In addition to group shirts, many people on the 3-day walk wore costumes or parts of a costume. The 3-day community is big into pink, tutus, and boas. Again, I believe many of them look forward to assembling their walking costumes from year to year, and comfort on the actual walk is secondary. You will have to decide how much “extra” clothing you want to wear. As with all your gear, be sure to wear all articles of clothing on a training walk first!
What About Hats & Headwear?
I typically don’t wear hats, but I learned from my training walks that I would want to have one to help keep the sun off my face.
I thought the extra weight of the hat would be more bothersome than the rewards, causing my head to sweat more, but I was wrong! After trying out a baseball cap and a visor, I chose a baseball cap. The cap was also nice to wear while walking in the rain, and when I wore my rain poncho, I was able to clip the hood onto the brim of the cap to help keep it from blowing off. (I just used a small binder clip.)
Baseball hats and visors were the most popular types of headwear at the event, but I also saw scarves, garden hats, straw hats and cowboy hats, as well as many walkers wearing nothing on their heads. You can really wear whatever you want, just make sure you will be able to carry it when you are not wearing it (ie stuff it in your backpack or clip it to the outside). And be sure to wear it during training walks to make sure you are used to it before the event.
Sweat Removal On The Go
I didn’t wear any kind of sweat bands, but I saw others wearing them both around their forehead and wrists.
I used a towel that I tucked hanging off my shorts to wipe sweat from my face. It was actually half of a thin hand towel. These were very easy to use and keep extras in my backpack.
Regarding bath towels and washcloths… At the 3-day Komen event, they offered a towel service for $12 for 2 nights in camp. It was well worth it and I encourage you to use it. It eliminated the need to pack towels and to figure out what to do with wet towels.
Yes, Sunglasses Are A Necessity
Even during walks in cooler weather, you will probably want to have sunglasses.
Be sure to find a pair you can wear all day. Tossing on a pair of glasses for a quick trip to the store is different than wearing them for 3 days straight with your face sweating the whole time. You won’t want them to pinch or cause a headache.
You may want to consider a security strap for your sunglasses. I didn’t have one, and I was afraid I might lose them when they were perched on top of my head or anytime I took them off. Luckily, I didn’t lose them, but I had a spare pare in my backpack just in case.
Choosing A Backpack Or Fanny Pack
Just like the walking shoes, you will get a different answer on which is preferred depending upon whom you ask. You will need to figure out what is most comfortable for you and then try it out on training walks, fully packed.
A good place to start is to think about whether you prefer a waist/fanny pack, or an over-the-shoulder backpack.
I already had a waist pack that I used to wear hiking and thought it would be perfect. Turns out it wasn’t really big enough, and I ended up not wanting a waist pack at all. I didn’t like it tight around my waist, putting pressure on my stomach/bladder. So I began the hunt for a backpack.
You may already know there are many, many, many different types of backpacks out there! To narrow it down, I knew I wanted (1) water bottle holders on the outside and (2) at least one small, zippered external pocket.
In the stores, I could eliminate some backpacks because they were fairly heavy before anything was loaded into them. I actually adjusted the straps and tried them all on before buying them. Just like the shoes, I tried out several at home (keeping tags attached and receipts handy) before making a decision.
The one I chose was Coleman Revel 8L, with an internal hydration bag (similar to the popular CamalBak hydration packs). I actually did not use the hydration bag and straw and removed them.
I like this pack best because:
- It is narrower than most of the others, but still big enough to hold all of my gear.
- Inside the bag there are 2 main areas (1 formerly held the hydration bag) and 2 small zippered pouches.
- Outside there are 2 zippered areas and 2 mesh pouches.
- It also has built-in bungee straps to tuck things into.
- Since it comes with the hydration bag, it doesn’t have external water bottle holders. However, I was able to put my water bottle in the same area where the hydration bag would go and actually reach it without taking the pack off.
TIP: It is super important to be able to reach your water bottle pretty much all the time, but not have to carry it in your hands. It helps that I have long arms and was not afraid of the calisthenics required to not only take the bottle out, but to put it back in. I will also say that every single person walking behind me who saw me doing this offered to help.
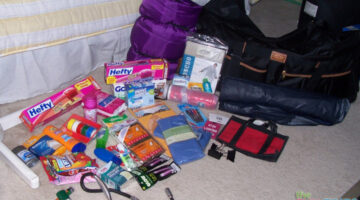
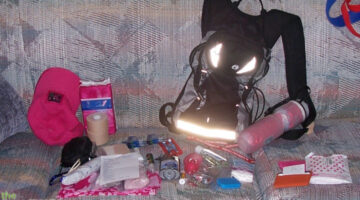
Here is a list of what I carried in my pack on my 3-day walk.
Once you have the pack that you plan to use and adjust it to fit you, be sure to cut off or tack down any extra-long straps or straps that you won’t be using. My backpack has a strap to go around the front at the waist and I knew I wouldn’t use it, but I didn’t want to cut it off — just in case I want to use it that way in the future. Instead, I used packing tape to keep all the strappy parts contained.
Overnight Bag For All Your Gear
On the 3-day Komen walk, each person is allowed ONE (1) bag weighing a maximum of 35 pounds after it is packed. This means that your bag and everything you pack into it must weigh less than 36 pounds.
This is tricky, and I will admit that my packed bag weighed close to 42 pounds. The mechanism for the wheels was heavy all by itself, and I couldn’t figure out anything to leave behind. I did the best I could, and I would try to be even better at this part next time.
I cautioned the crew guy it was a little over and he just smiled and shrugged it off. I saw a huge variety of bags and packing methods, and I guess mine was one of the closer ones to the mark.
Keep in mind, this bag must hold everything you will need for camp that you will not be carrying on your person as you walk each day. This includes all but the tent you will sleep in, which is provided. Nothing can be attached to the outside of the bag (with bungee cords for example) for the safety of the crew who will be transporting your bag. So your sleeping bag, pillow, air mattress, air pump, etc. must all fit inside one single gear bag.
When you arrive at the check-in on Day 1, you will take your bag from your car to the gear trucks. The truck will deliver it to camp. At camp, after walking over 20 miles, you will collect your bag — and your tent — and haul them to your assigned tent space. I strongly suggest using a bag with wheels! You will not want to carry your bag even one step.
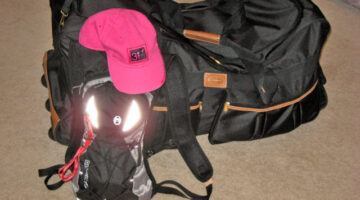
After reading the suggestions of previous participants, I wanted a 36” wheeled duffle bag. I couldn’t find one at any of my local stores and finally found one online through eBay. It was perfect size-wise, but a little heavy due to the mechanism for the wheels. Also helpful were the 2 outside zippered pockets. You may have to leave your bag outside your tent at night, and it would be convenient to have the pockets for items you may need through the night.
I was provided an extensive packing list, and I learned quite a bit by reading the blogs of other walkers. My packing list is here (with some extra notes here). These might also be helpful to you.
Whatever walk you are doing, be certain that you know what will be provided for you (such as the tent) and what you need to take with you.

